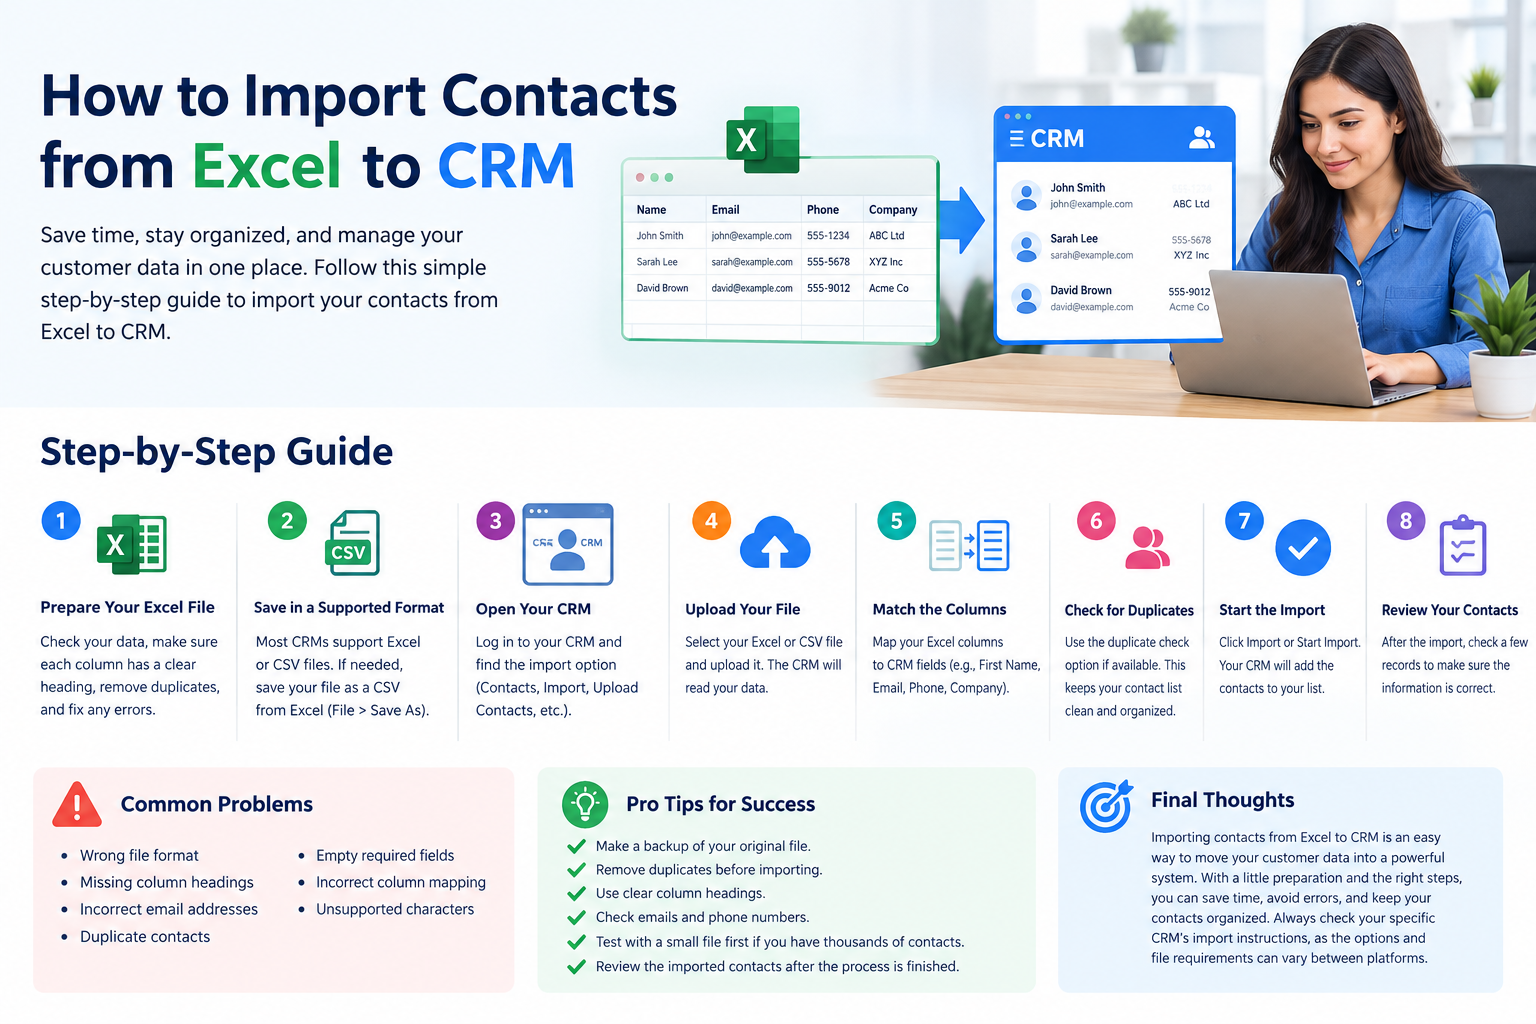
How to Import Contacts from Excel to CRM
How to Import Contacts from Excel to CRM
Importing contacts from an Excel file into a CRM can save a lot of time. Instead of adding each contact one by one you can upload many contacts at once. This guide explains how to import contacts from Excel to CRM in simple steps.
What Is a CRM?
A CRM or Customer Relationship Management system helps you store and manage customer information. You can save names phone numbers email addresses company names and other details in one place.
Why Import Contacts from Excel to CRM?
Many businesses already keep their customer information in Excel. Importing this data into a CRM can help you:
Save time
Avoid manual data entry
Keep customer information organized
Manage many contacts easily
Reduce typing mistakes
Start using CRM tools faster
How to Import Contacts from Excel to CRM
The exact steps can be different depending on the CRM you use but the basic process is usually similar.
Step 1: Prepare Your Excel File
Before importing contacts open your Excel file and check the information. Make sure each column has a clear heading.
Step 2: Save the File in a Supported Format
Most CRM systems support Excel or CSV files. If your CRM does not accept an Excel file save the spreadsheet as a CSV file.
In Excel you can usually do this by selecting File > Save As and choosing CSV as the file type.
Step 3: Open Your CRM
Log in to your CRM account. Look for an option such as:
Contacts
Import Contacts
Import
Upload Contacts
Add Contacts
The name may be different depending on your CRM.
Step 4: Upload Your Excel or CSV File
Select the import option and upload your prepared file. Choose the Excel or CSV file from your computer.
The CRM may take a few moments to read your data.
Step 5: Match the Columns
This is an important step. Your CRM may ask you to match the Excel columns with CRM fields.
For example:
First Name → First Name
Last Name → Last Name
Email → Email
Phone → Phone
Company → Company
Check the fields carefully before continuing.
Step 6: Check for Duplicate Contacts
Some CRM systems can find duplicate contacts during the import process. If this option is available use it.
Duplicates can make your contact list difficult to manage so it is better to clean them before or during the import.
Step 7: Start the Import
After checking the information click the Import or Start Import button.
Your CRM will add the contacts to your contact list. Large files may take a little longer to process.
Step 8: Check Your Contacts
After the import is complete open your CRM contacts page. Check a few records to make sure the names emails phone numbers and other details were imported correctly.
Common Problems When Importing Contacts
Sometimes an import may not work as expected. Common problems include:
Wrong file format
Missing column headings
Incorrect email addresses
Duplicate contacts
Empty required fields
Incorrect column mapping
Unsupported characters
If you get an error check your Excel file and try importing it again.
Tips for a Successful CRM Contact Import
Follow these simple tips:
Make a backup of your original Excel file.
Remove duplicate contacts before importing.
Use clear column headings.
Check email addresses and phone numbers.
Test with a small file first if you have thousands of contacts.
Review the imported contacts after the process is finished.
Final Thoughts
Learning how to import contacts from Excel to CRM is useful for businesses that already have customer information in spreadsheets. By preparing your Excel file matching the correct fields checking duplicates and reviewing the imported data you can move your contacts into a CRM quickly and easily.
Always check your specific CRM’s import instructions because the available options and file requirements can vary between CRM platforms.
Short meta description:
Learn how to import contacts from Excel to CRM with this simple step-by-step guide. Prepare your Excel file upload contacts match fields and check your data.












Post Comment